
I have been busy working with AI-image generation the last couple of months, and I thought it is about time to talk about it a bit in-depth.
If you want to check out my AI stuff head over to instagram: https://www.instagram.com/_.deaddreamer._/
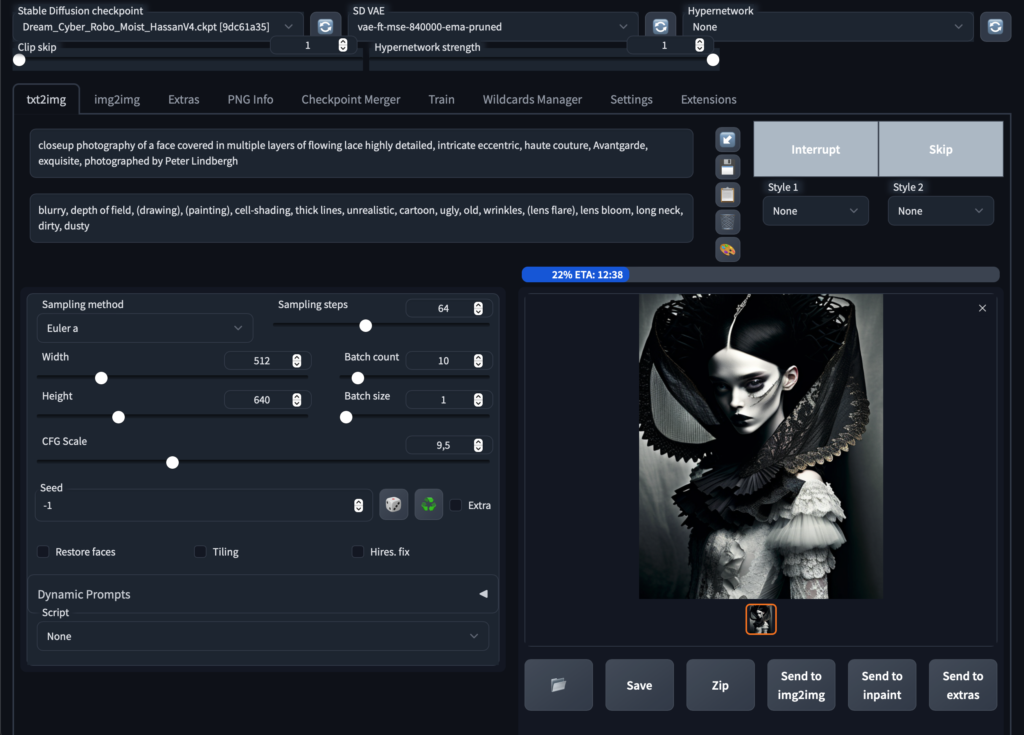
My tool of the trade is Stable Diffusion, with is installed locally and can be run via command line or via Automatic1111s webinterface, which I am using. Here how it looks like in all its glory:
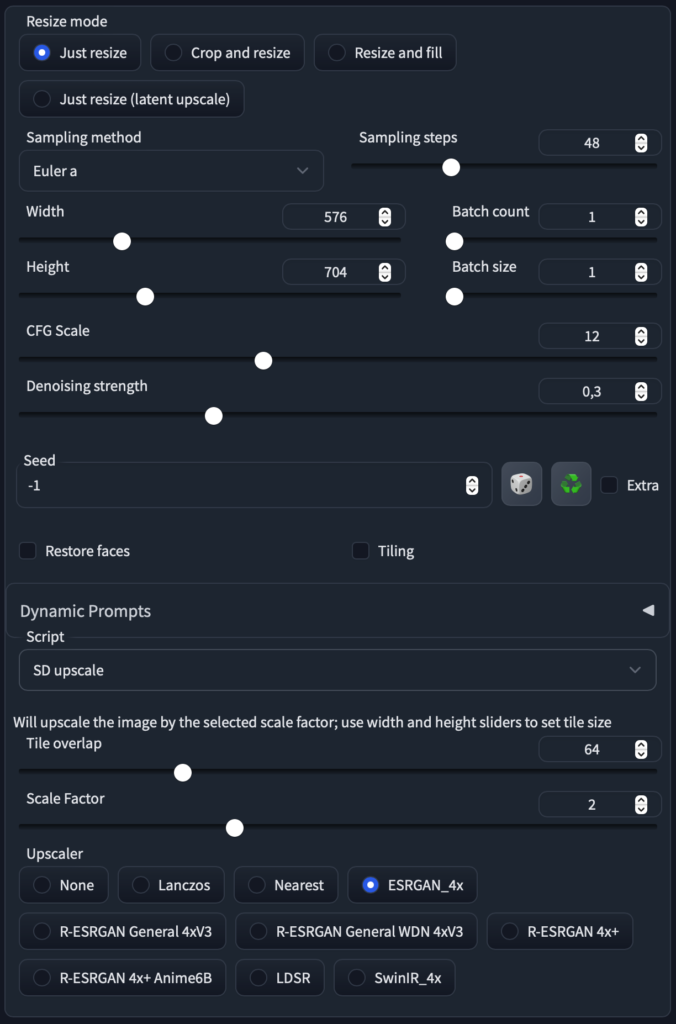
In Stable Diffusion there are many parameters you can change which gives you a lot of opportunities but it also takes a while to understand. Generally speaking you enter a prompt that you want the image to look like, and an optional negative prompt (what the image should exclude).
The base resolution in which SD renders images is generally low, since the images SD 1.5 is trained on is only 512×512 pixels, so it does not make sense to get much higher in the initial round. Also, of course, the bigger the longer it takes. User with powerful rigs can use Highres Fix to get over this issue, but most (like me) will have to do it differently.
How the image looks like does not only depend on the parameters but also which checkpoint (or model/diffusor) is used. SD initially started with their own model but since its open source other creative minds have used it to train models on more specific images. Those models can again be merged so it is possible to have a rather unique blend.
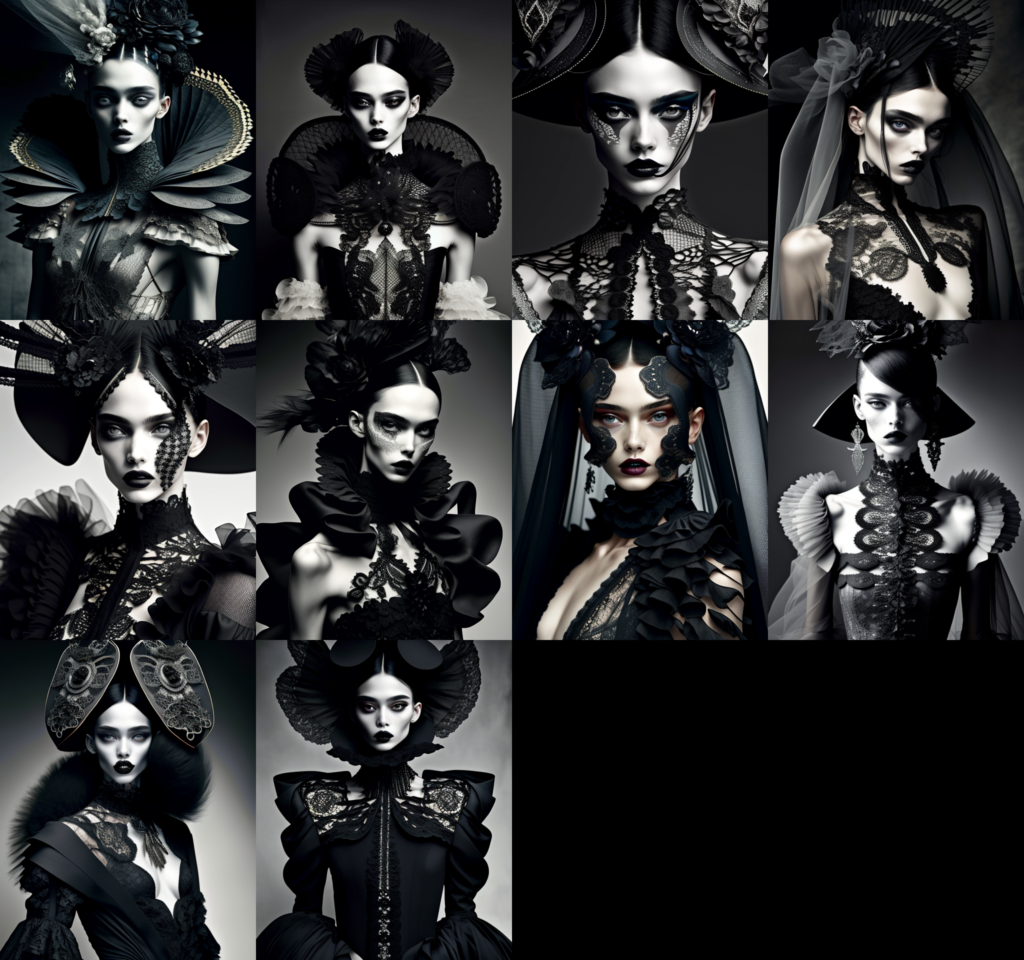
When I find a prompt that looks promising, I usually let the computer run overnight and let him generate 100 variations. For this quick example I generate 10 images, which took around 20 minutes or so. Here the results:
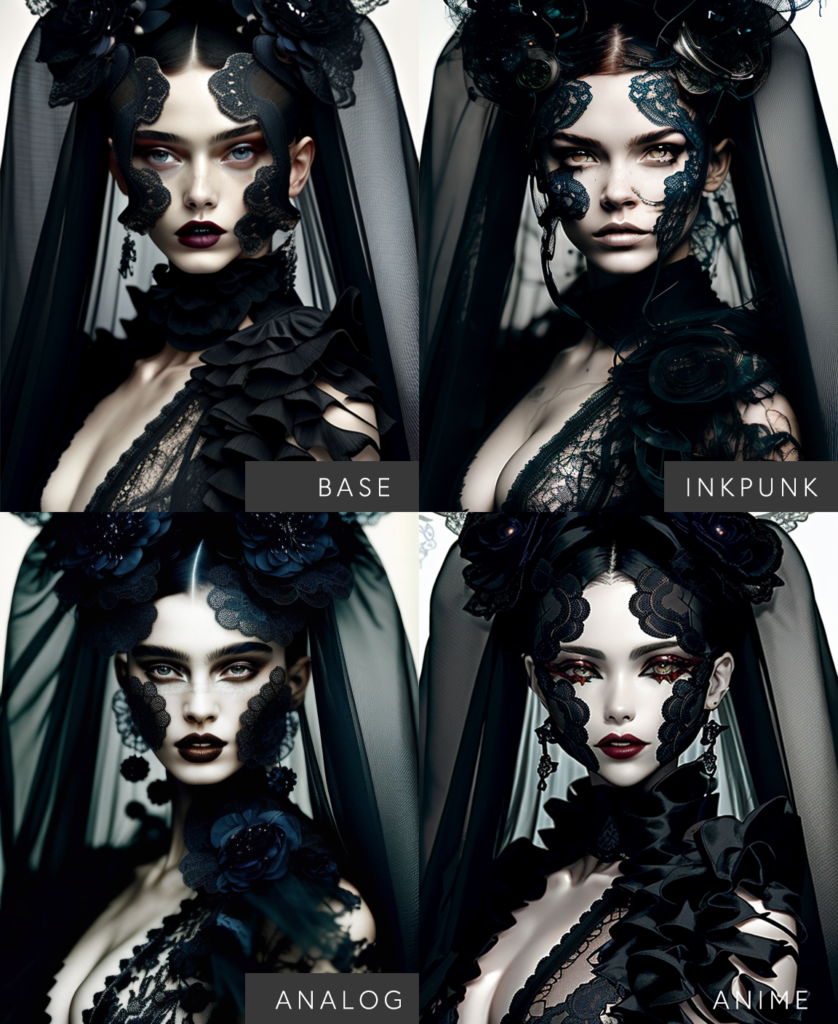
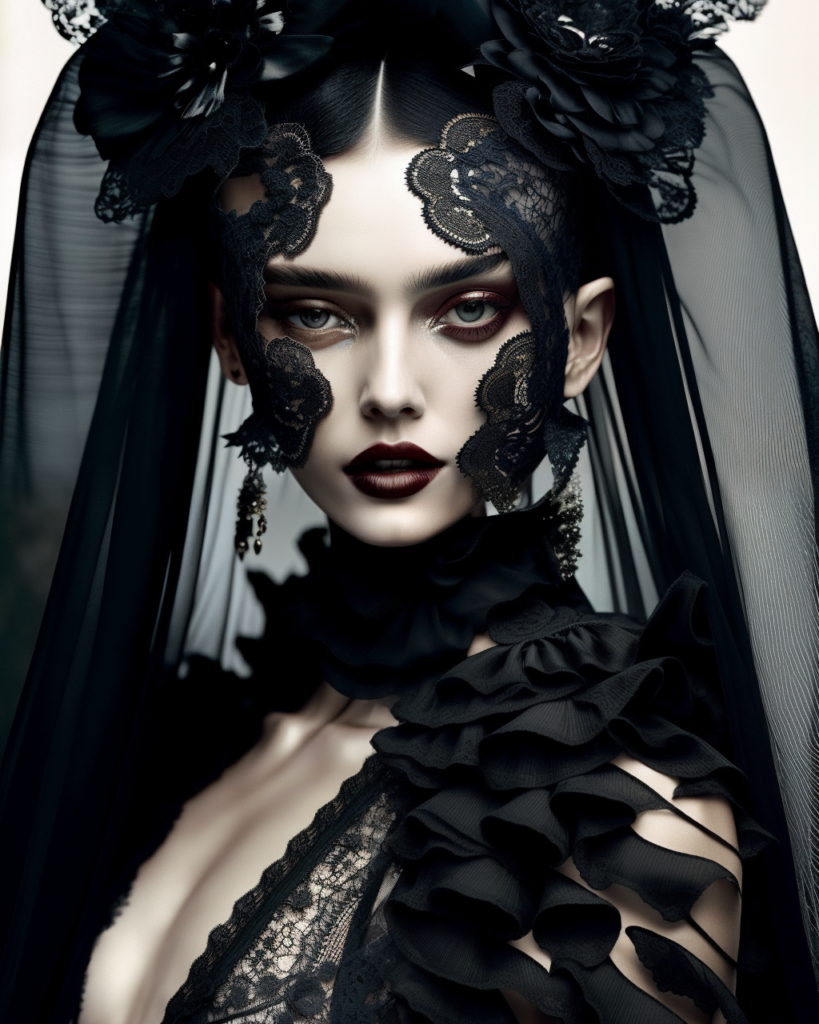
The checkpoint (diffusor) that I created is more on the creative / illustrative side so its a good starting point, however I like it ever more realistic. This I do in the next step, with img2img. This is the tool I feel in love with when I heard about SD. You basically take an image as a base and interpolate it again with another prompt. You can modify the prompt, or you can modify the diffusor. Some diffusors also need trigger words that they unleash their training, for instance inkpunk diffusion uses nvinkpunk as a trigger, this you put into you prompt.
Note that I did not change the prompt, the difference is just because I am switching to a different diffusor and trigger it with the keywords.
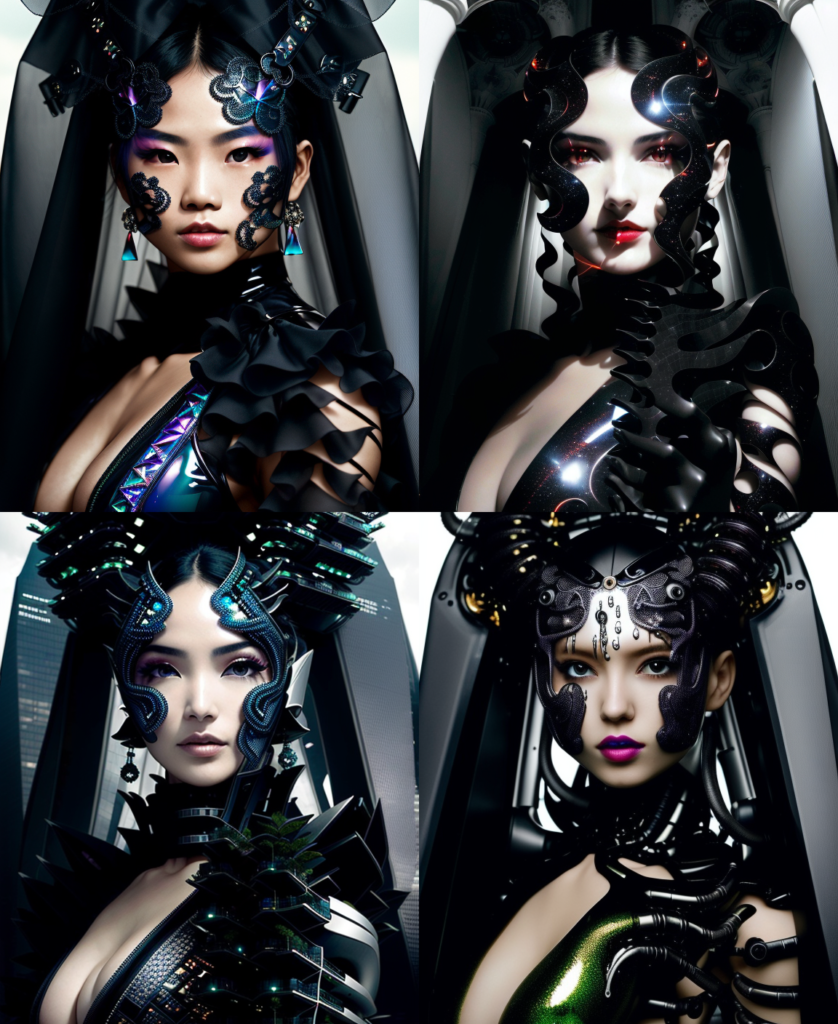
or go crazy and change the prompt completely so it mixes in with the base image:
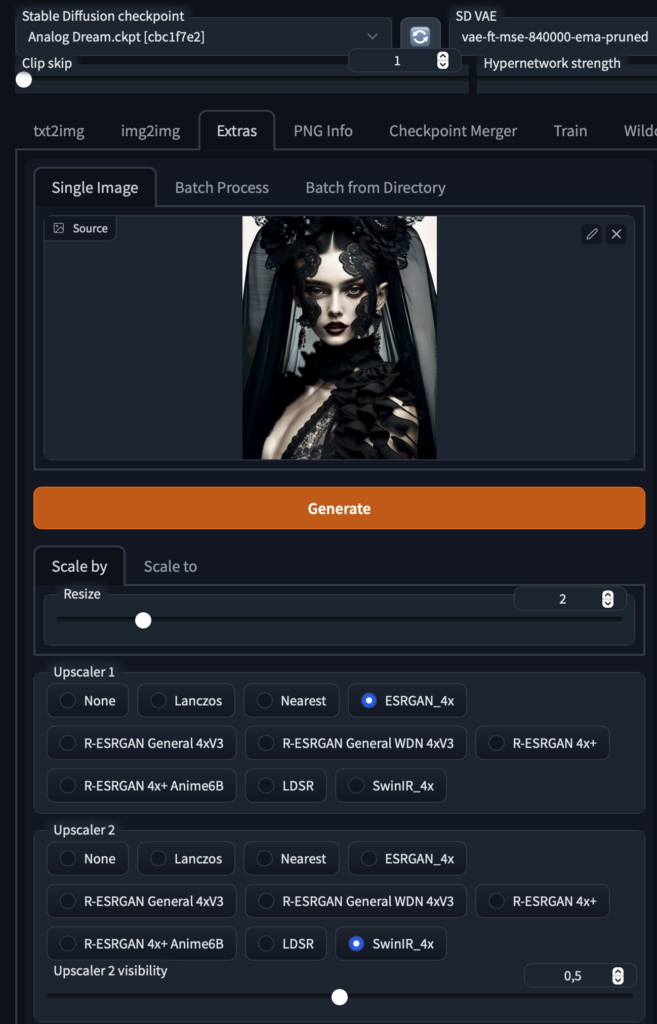
This step of fine-tuning I combine with the next one, to upscale the image via img2img. Basically he slices the image into smaller parts, which runs again though the diffusion. this way a lot of detail can be added.
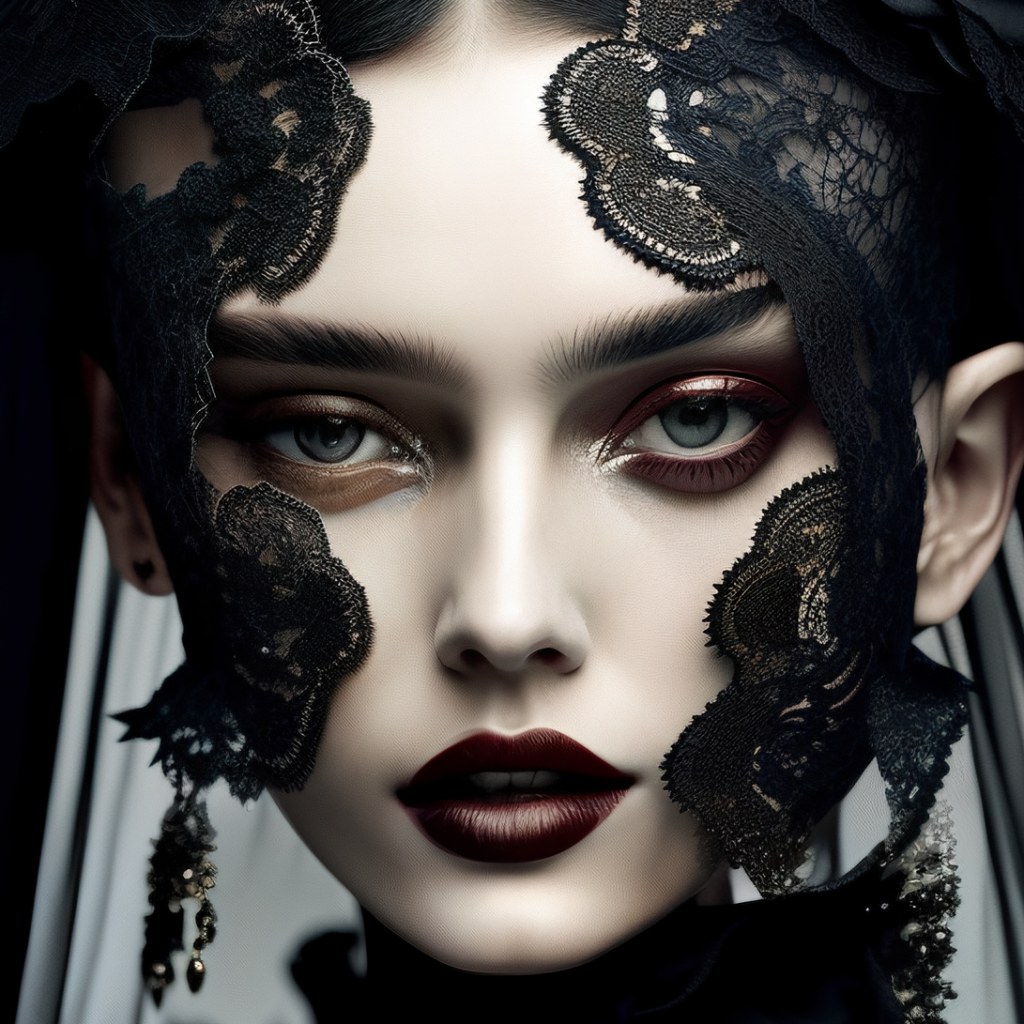
with a scale factor of 2 the render times are still reasonable and we get our image up to 1024×1280 while increasing detail and modifying the appearance
This is already nice for web, but if you want to go all out, upscale it at via the extras tab
that should do it for most uses. Finishing touches can be made with photoshop or other image manipulation tools (see top of the lip for instance, patching error)
Hope this gives you a decent overview how to generate good output with Stable Diffusion. See you in the lateral space!