So, you’ve got Automatic1111 installed on your PC and you’re wondering how to generate the highest quality images? Hopefully this article can help with that.
Terms and Abreviations
A1111 – Short for the Automatic1111 web-ui. A robust web interface developed for Stable Diffusion by Automatic (https://github.com/AUTOMATIC1111/stable-diffusion-webui for more info)
SD – Short for Stable Diffusion
Checkpoint / Model – I will use these terms interchangeably throughout. This is the heart of your Stable Diffusion experience, and will dramatically change your outputs. It’s a saved state of a neural network which allows us to transfer a collection of “weights” and “biases” from one machine to another. I recommend https://civitai.com/ to browse and download models made and fine-tuned by the community.
There’s a lot to discuss on this topic, and I’ll probably do another tutorial about models/checkpoints specifically in the future.
The txt2img interface
When you first open Automatic1111 you’ll be greeted with this page, and it can look pretty intimidating and overwhelming at first so let’s break it down.
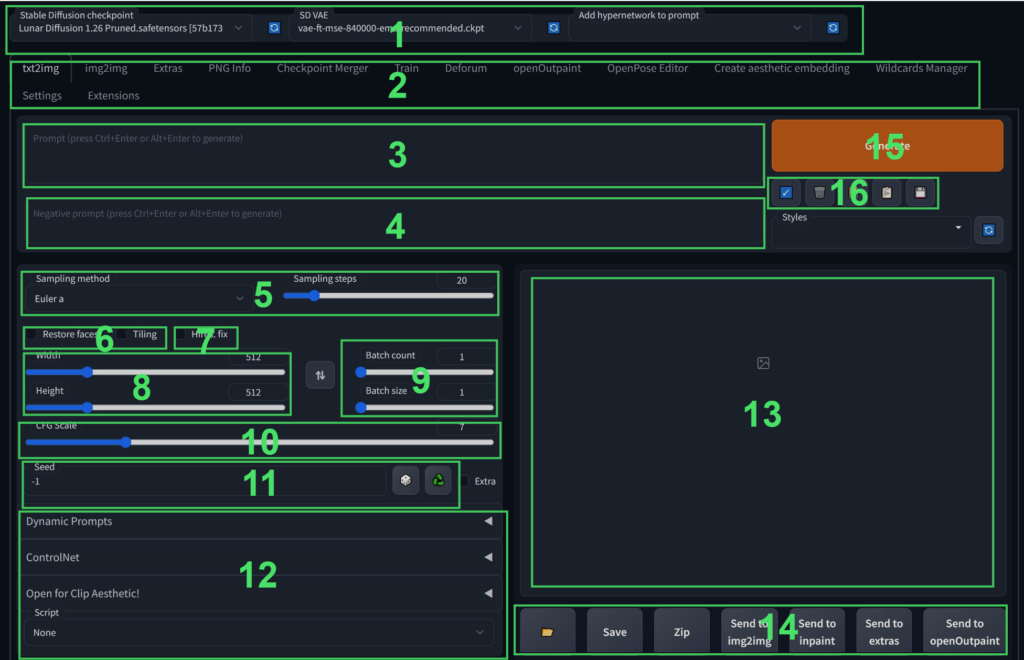
- By default this will display the “Stable Diffusion Checkpoint” drop down box which can be used to select the different models which you have saved in the “\stable-diffusion-webui\models\Stable-diffusion” directory. If you’ve saved new models in there while A1111 is running you can hit the blue refresh button to the right of the drop down to refresh the list.
Other drop downs can be added to modify other parameters, however that is outside the scope of this tutorial. - These tabs will take you to the different areas of the A1111 interface. I will discuss the other tabs in detail in another post, but for our purposes today we’ll be using the “txt2img”, “img2img”, and “Extras” tabs.
- This is the positive prompt. Used for describing the image which you would like to generate.
- This is the negative prompt. Used for describing things which you would not like to see.
- This drop down will allow you to select the sampler which is used to generate an image and how many steps are performed on a generation. In this tutorial I’ll be using Euler Ancestral (Euler-A), but I encourage you to try different samplers to find the one that works best for you and your style.
- Restore faces and tiling. These do what they say, I personally don’t use either but “Tile” will try to ensure that the edges of an image will line up with itself for tiling, and “Restore Faces” will use either codeformers or GFPGAN to attempt to restore faces in an image.
- This checkbox enables the “Hires.fix” to generate images at images larger would be possible using Stable Diffusion alone. I’ll go into greater depth on this later in the article.
- This controls the resolution which an image is initially generated at.
- “Batch count” controls how many batches will be generated, and “Batch Size” controls how many images are made in each batch. (These numbers are multiplied together to get the total images generated) Batch Size is largely dependent on how much Video RAM (VRAM) your graphics card has available.
- CFG Scale is essentially how much freedom the AI has from the prompt. The lower the value the more creative freedom SD has.
- This is used to set a specific seed to generate an image from. The button with a picture of dice on it will set the value to -1 which will produce a random seed, and the button with the recycling symbol on it will use the seed from the image selected in section 13
- Some 3rd party extensions will place menus in this area.
- Generated images will be displayed here.
- These are transport controls for (in order) opening the txt2img output directory, saving an image to a directory, zipping a set of images, sending an image to the img2img tab with generation parameters, sending an image to the inpaint tab with generation parameters, sending an image to extras, additional buttons added by installed extensions.
- This button will start your generation and will change to allow you to skip or cancel a generation while one is running.
- This will (in order) restore the previous prompt, clear the prompt, load additional networks (will detail in a later post), load a saved style, save a style from the current prompt.
Generating an image (txt2img tab)
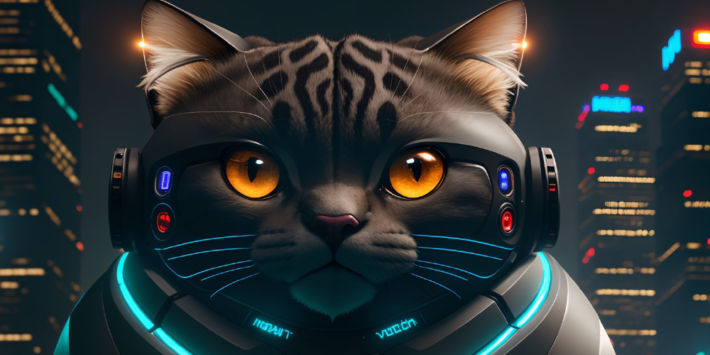
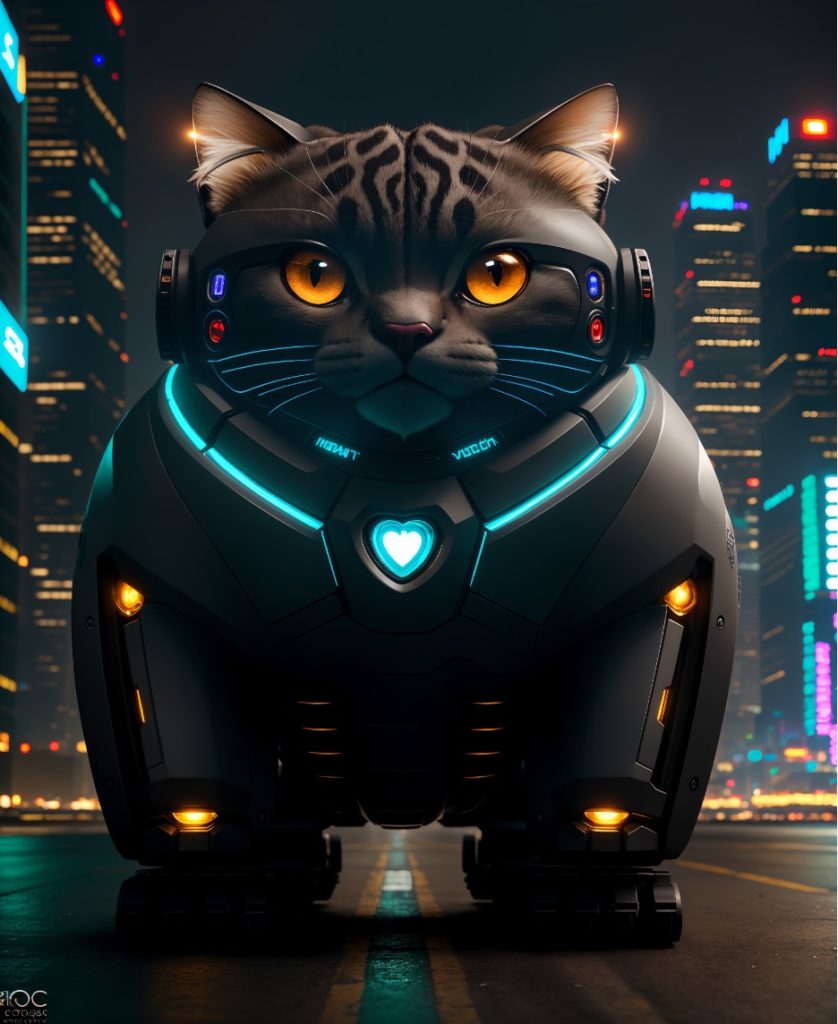
So now that we’ve got that out the way, let’s get to the fun stuff, making an image. First thing to do is decide what you want to make, what you want to use it for, and what aspect ratio would be best for that purpose. In this tutorial I’ll be making a photo realistic image of a cute robot cat for Instagram in a 4:5 aspect ratio.
Let’s start by setting our image parameters to get that out of the way.
Model: I’ll be using the latest version of my custom model called Lunar Diffusion which I make available to my Patreon subscribers, but you can get great results with many models.
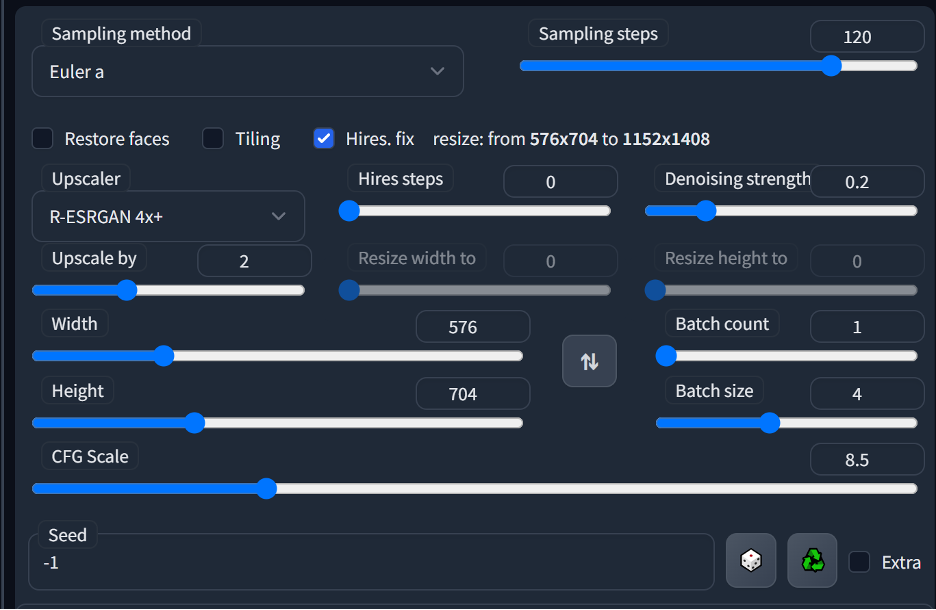
Sampling Method: I find that Euler a works really well for my style so I’ll be going with this.
Sampling Steps: I personally use a very high step count, this is not necessary and may actually cause you issues. The higher the amount of steps the more detail will be added to an image, however, it will also cause a lot more artifacts and undesirable elements which may need to be removed in post using something like photoshop. For high quality generations I recommend a value of at least 50, and encourage you to play with different values to see what works best for you.
Hires. Fix: Enabled. I set my Hires steps to 0 so that it performs the same amount of hires steps as regular steps and in this example I’m using the R-ESRGAN 4x model as for upscaling. For the denoising value I like 0.2 and seldom go much higher than that (the higher the denoising value the less it will respect the original generation and will have more freedom to change the image potentially leading to unwanted changes)
Resolution: I’m using 576×704 as my initial resolution, this will be upscaled to 1152×1408 by hires fix. I find that this gives me a good coherent image at the proper aspect ratio for Instagram. Resolution has a huge effect on your final image. Try to keep these values below 768 to maintain coherence, most of the models available today are trained at either 512×512 or 768×768 and images that go outside of these resolutions are treated as multiple images that are stitched together leading to a lot of undesirable results.
CFG Scale: I like to use values between 7 and 9 as I find that gives me the best mix of my intentions being respected while still giving the AI some creative freedom to make an interesting image. CFG values below 5 tend to be very incoherent and images over a CFG of 12 tend to have an “over cooked” look where the colors are “burned”. Experiment with it to see what works best for your particular style.
Batch Count: I’m running a single batch of 4 images for a total of 4 images. How many images you can generate here depends entirely on the VRAM that your graphics card has.
Text Prompt: Now we’ve got a good set of image generation parameters, let’s work on the text prompt. We wanted to generate a robot cat for Instagram so the prompt I came up with for this tutorial is:
“a photograph of a chonky cat, cute cyberpunk robot, biomechanical, hyper detailed, very fine details, (photo realistic:1.5), professional photoshoot high key lighting, art by James Cameron”
With a negative prompt of:
“cartoon, 3d, (disfigured), (bad art), (deformed), (poorly drawn), (extra limbs), strange colours, blurry, boring, sketch, lacklustre, repetitive, cropped, (split screen:1.25)”
Prompting is a largely personal thing, and a lot of experimentation will be needed to find the right style that works for you. In the above prompt you’ll notice that I’ve separated concepts with a “ , “ this helps to not only keep your prompt organized but helps SD to understand what you want. You’ll also notice some things are (in brackets:1.42), this adds weight to the part of the prompt inside the brackets, with the higher the numerical value the more weight added. To reduce weight of something in a prompt use [square brackets:1.42].
The negative prompt will direct the image away from the things listed in there and uses the same bracket weight syntax as the positive side.
Time to hit generate and see what we get!
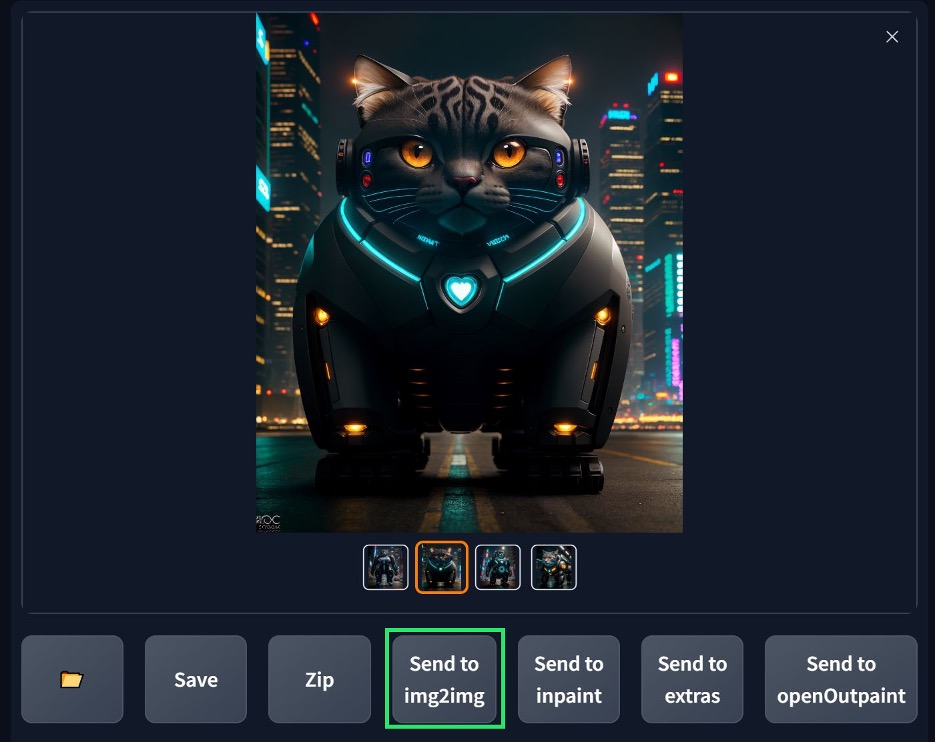
Now it’s just time to hit the generate button or “CTRL-Enter” to generate a batch of images. If you don’t like the image you get, change the prompt as you see necessary and try again. Once you find something you like, make sure it’s the selected image and hit the “Send to img2img” button. Inpainting is outside the scope of this tutorial but can be used to change selective parts of an image to great effect and you can also send your image to the inpainting module instead if needed.
I went with this handsome fellow:
Modifying and upsampling an image (Img2img tab):
This will move us to the img2img tab in A1111 and allow us to make any changes to the image that we want.
The image should move over with the parameters used to generate it already filled out for you. These can be changed if you’d like to make tweaks, but I’ll be leaving them the same for this tutorial.
You can “Re-Roll” your images at this point if you’d like some variations on them by regenerating them. How much the image is changed is controlled by the “Denoising Strength” slider. In my experience a value of below 0.3 will produce an image which is mostly the same but has some minor changes, 0.3 to 0.45 will give you a slight but noticeably different image, .45-.65 will give you an image largely influenced by the original image but may be significantly different than the original, .65-1 will give you a mostly different image all together.
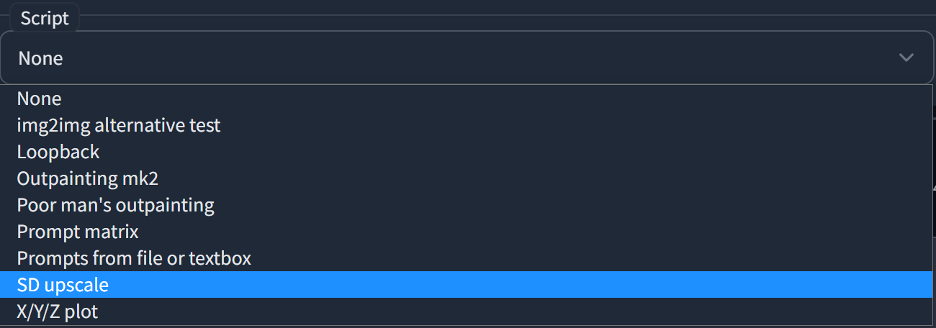
But I’m happy with my chonky fellow so let’s upscale him some more and add some more detail using the “SD Upscale” script included with A1111. This will break your image into multiple parts and upsample each one individually using the prompt in the img2img tab, then blends them back into the original image. Select the script drop down in the bottom left corner of the screen and select “SD upscale”.
Once selected it will open a panel with setting specific to SD_Upscale. I personally set a tile overlap of 128 to prevent any visible stitching of the images by SD Upscale. You’ll also need to select the upscaler which SD Upscale uses to upscale the image, I’m using Real ESRGAN 4x in this example.
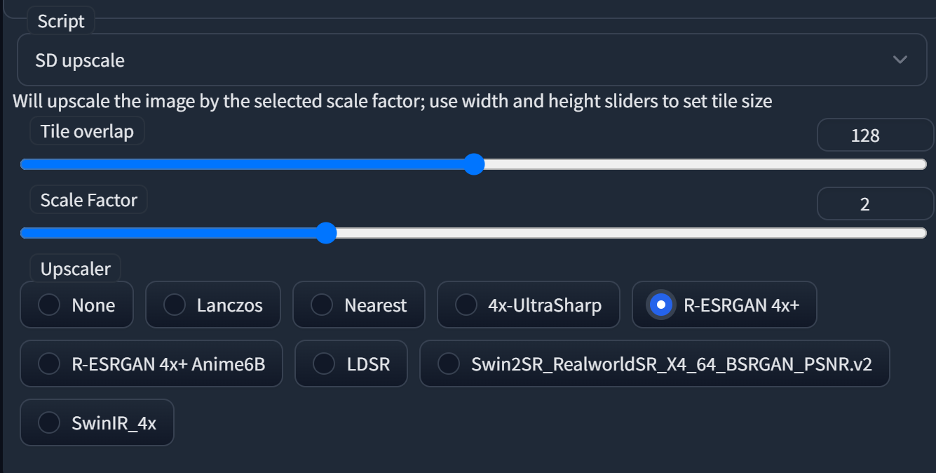
Once SD Upscale is enabled you’ll want to set the denoise value to control how much about your image will be changed by SD Upscale. I recommend a value lower than 0.2 and often use values lower than 0.1 myself.
These are the settings I ended up going with:
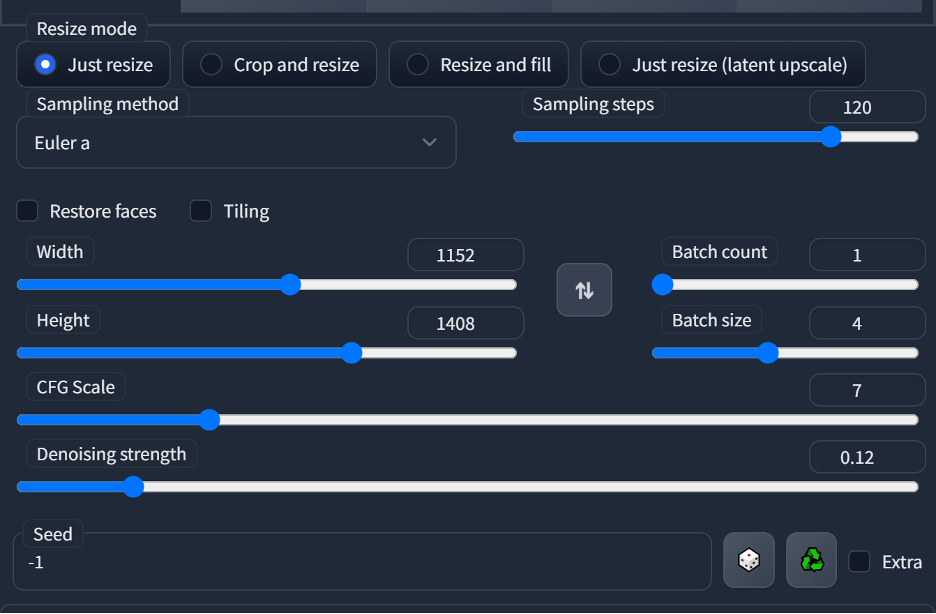
Which gives me a pretty nice result.

You’ll notice that some of the fur texture was lost in the process as SD Upsample has a tendency to smooth out fine details. I could reduce this smoothing by using a denoise value of < .05, but I’m happy with the way it looks, so I’m going to hit the “Send to extras” button to move the image over to the Extras tab for final upsampling.
Upscale an image (Extras tab)
This step is totally optional, but I like to give my images a final 2x upsampling before they go out. The extras tab allows you to run an image through up to 2 different upsampling models as well as perform any final face fixes with GPFGAN or Codeformers (use inpainting for face fixing though, you’ll get far better results than using these options).
These are the settings I typically go with:
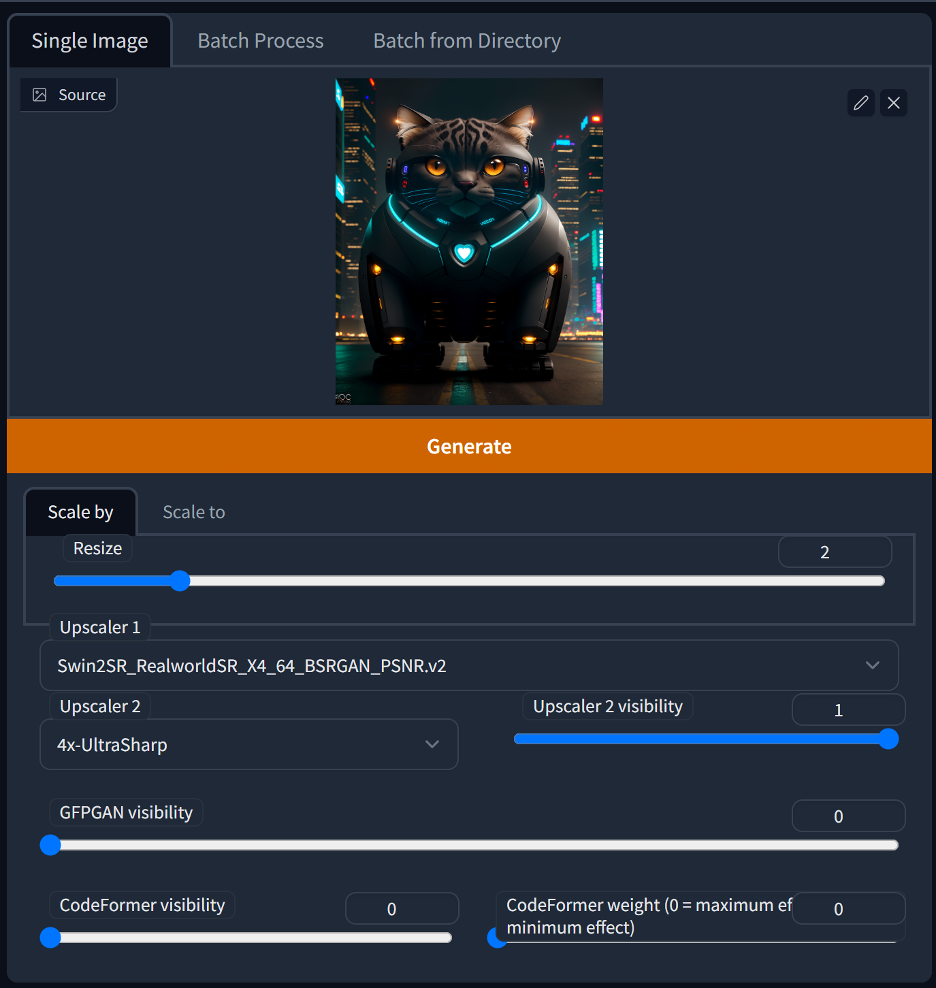
Which produces this final image, which I will then take over to Photoshop to make any further modifications or repairs to the image.
I hope you enjoyed this tutorial, or at least learned something new from it! There’s still A LOT that I didn’t even touch on in this tutorial so if there’s something you think I should write a tutorial on let me know!
You can find me on Instagram at https://www.instagram.com/mooncryptowow/
Facebook at https://www.facebook.com/profile.php?id=100087374733528
I also have a Patreon where I provide assistance with prompting, share all of my prompts and settings, as well as the latest version of my Lunar Diffusion model and any other files I may be using at https://www.patreon.com/mooncryptowow