
I started AI-Image generation around middle of august 2022 with Midjourney. I did fall directly in love with this new method of creating visuals, however Midjourney back then was still quite basic- some things (architecture, nature) worked quite well, some others (mainly humans) were a freak show to be frank. This changed with the photomode, which could generate quite decent faces and such, but did not include the characters in a setting – it was character only. With V4 which rolled out late last year a lot of the shortcoming were addressed, however I was getting more and more annoyed with the limitations and switched over to Stable Diffusion, which, after hitting some walls here and there proved to be the more flexible way – all the Stable Diffusion users I talked with have a different approach how to get to a final image – some tune and train their custom models with dreambooth, others go more into illustration / collage by using img2img and/or inpaint to get to the desired results.
One thing that I started to work on recently is to use the illustrative approach of Midjourney as a base and model over it with img2img in Stable Diffusion. In this post I will try to give a rough outline.
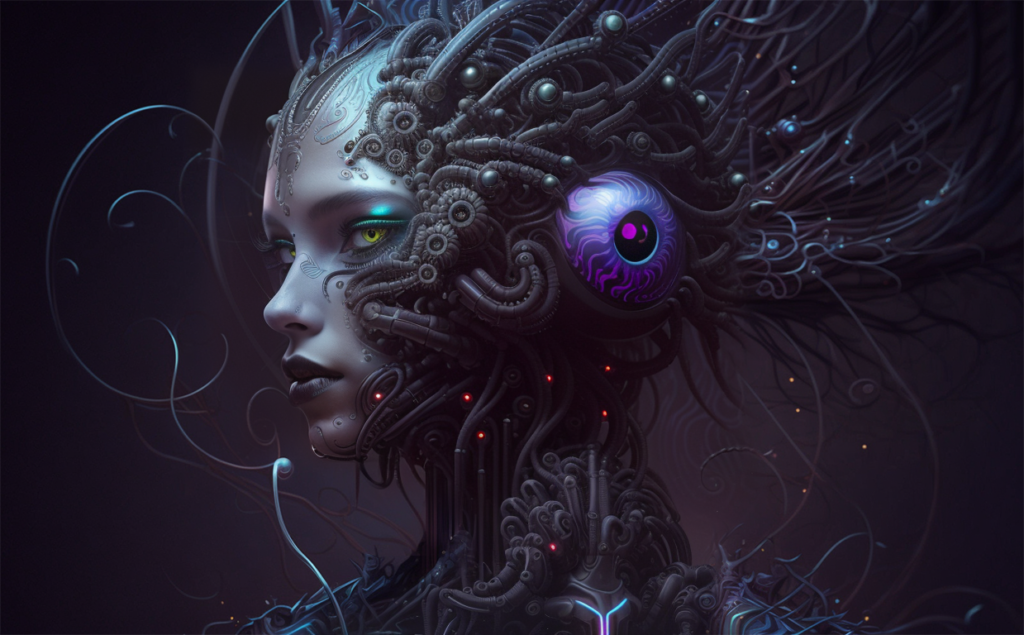
I started with image generation in Midjourney, this example is for a H. R. Giger Tribute in a wide aspect ration. After an hour or so of experimenting I got a base image that I though could work well:
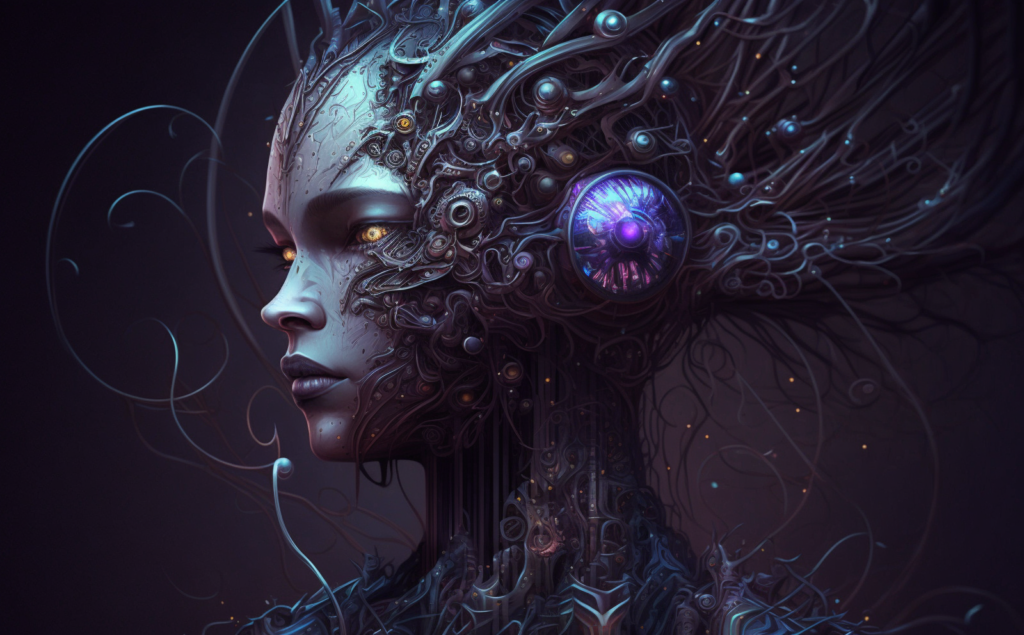
photo of beautiful alien cybernetic landscape :: 4 devil innocent girl wrapped in biomechanical organic slimy shiny vantablack shiny tentacle with suckers :: 3 full body :: 4 intricate neon glyph details :: 2 wet dripping hole connected with cables :: 4 crouching on platform :: 4 by h.r giger :: 2 –ar 16:10 –q 2 –v 4 –s 750
initial prompt in Midjourney
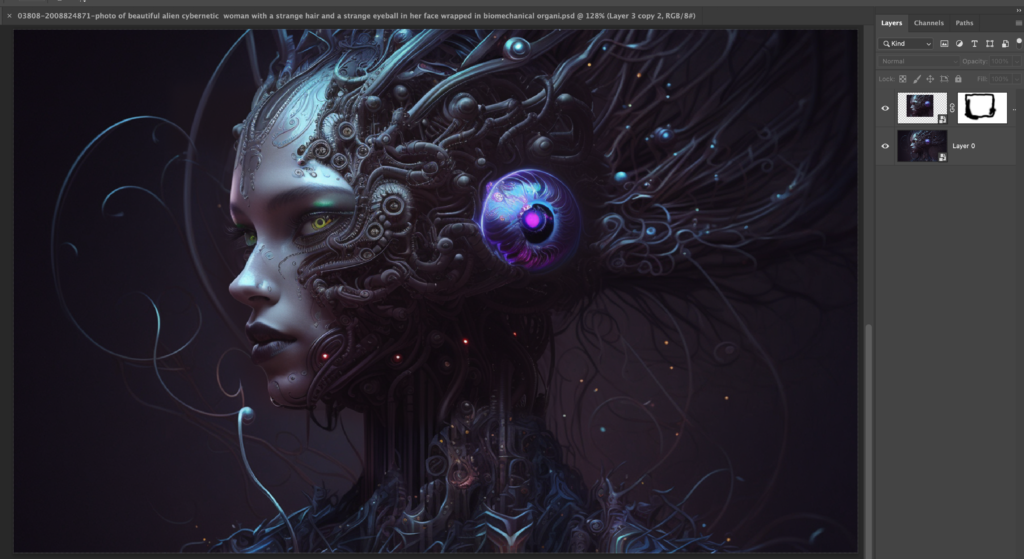
The resolution of the image is ok, but not superhighres with 1600×992 and the image also has a rather painted look. I prefer a sharper look, so we will see that we get this done in Stable Diffusion. First we will reduce the size of the image. This might sound paradox, but we are not loosing much since the image is rather blurry anyway Also, we need to get into a manageable size to work efficiently – SD is trained on 512×512 chunks, everything too much bigger results into long rendering times and bad quality. Since I will only work in segments of the image I still don’t have to go that low, but roughly around 2x of the base rendering which gives me 1239×768.
I now start selecting a part of the image to use in img2img – I use a fixed size to keep the aspect ratio, I could also use square, but in this example landscape works better for me.
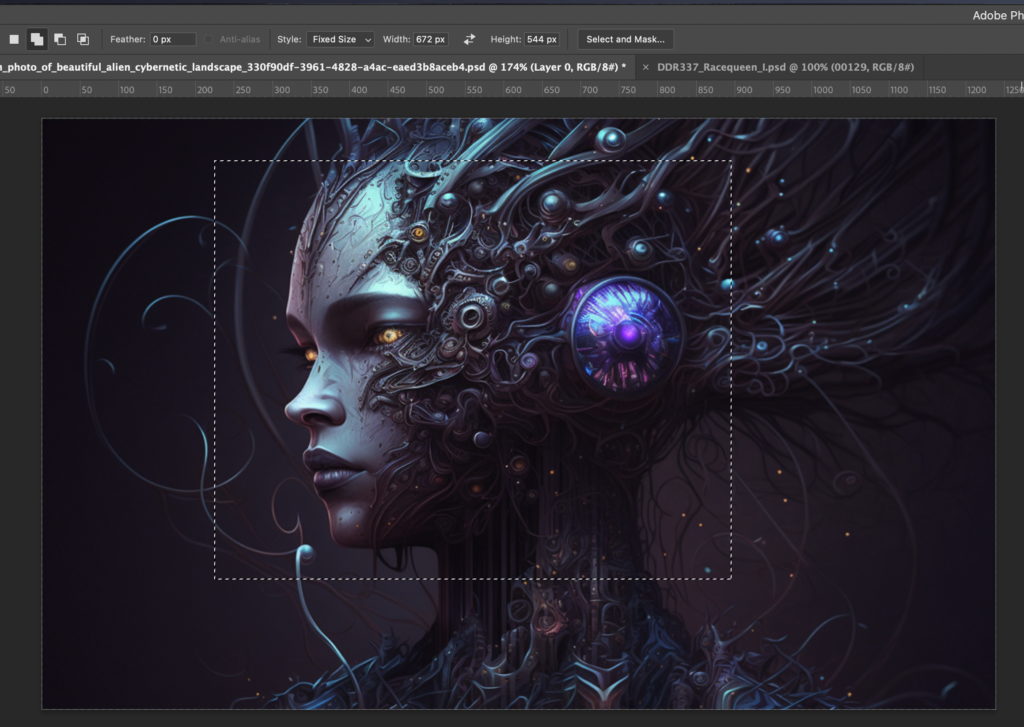
Something that I just noticed yesterday (!) by accident is that you can just copy the segment in photoshop and paste it directly into Automatic1111s interface without saving it as image, a thing that I did on a almost daily basis since three months. Oh well.
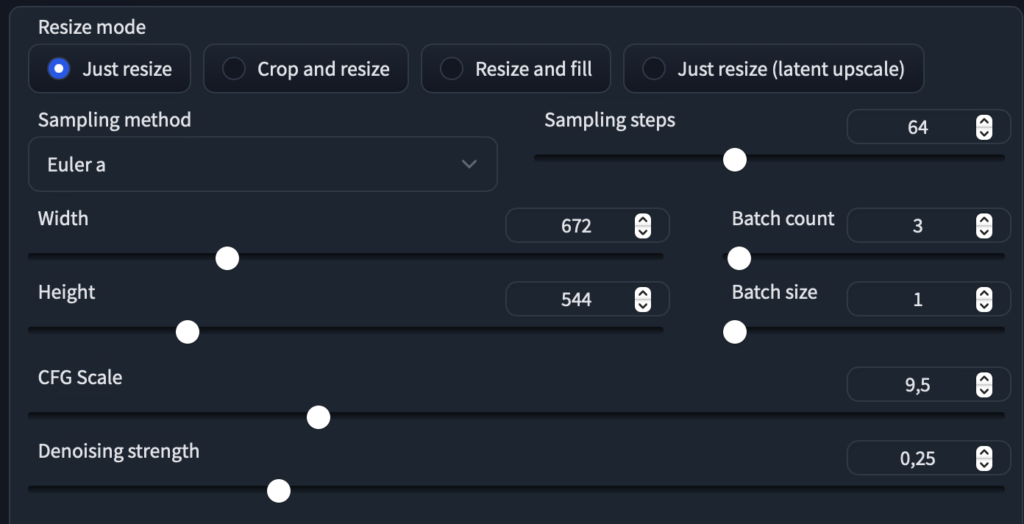
The new prompt is a mix of the initial midjourney prompt combined with the analysis of the CLIP Interrogate plus I ditched everything that did nothing to the image.

To get some variety I keep the denoising strength rather high (at .25) and run some iteration though some models to see what works.
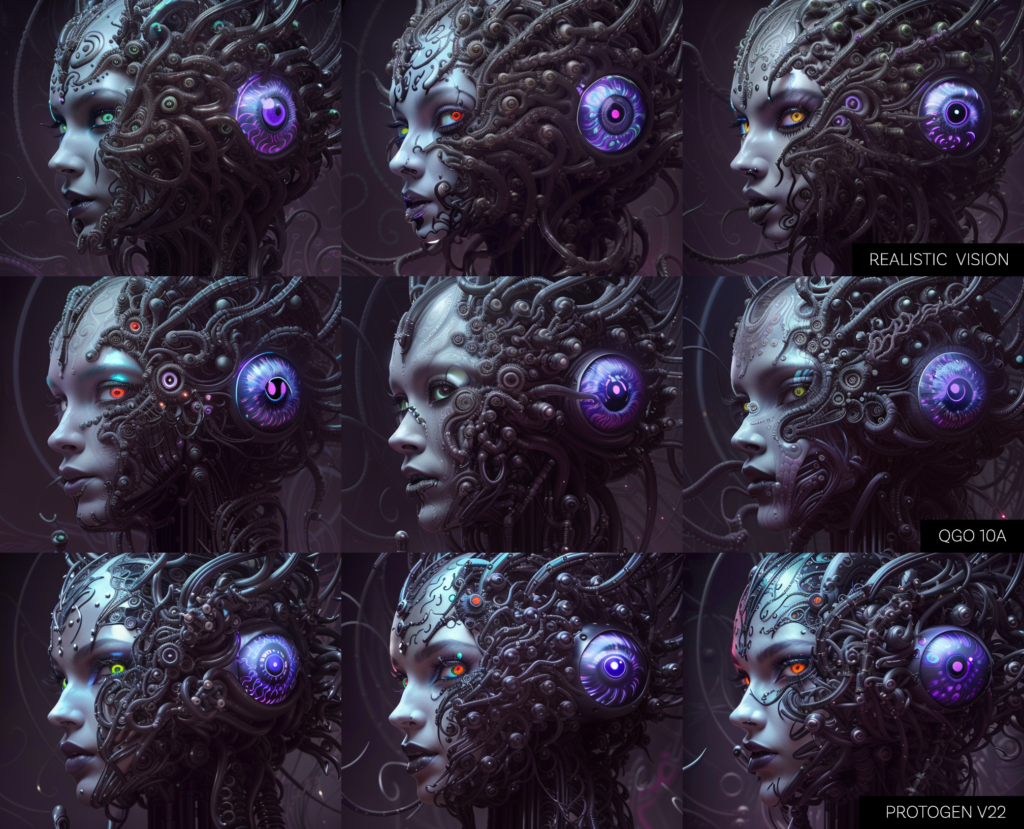
ATM I use Realistic Vision and Protogen V22 a lot, here I feel QGO is what I want to start off with. I make some more Iterations, paste the output into photoshop and remove the stitches at the side of the image
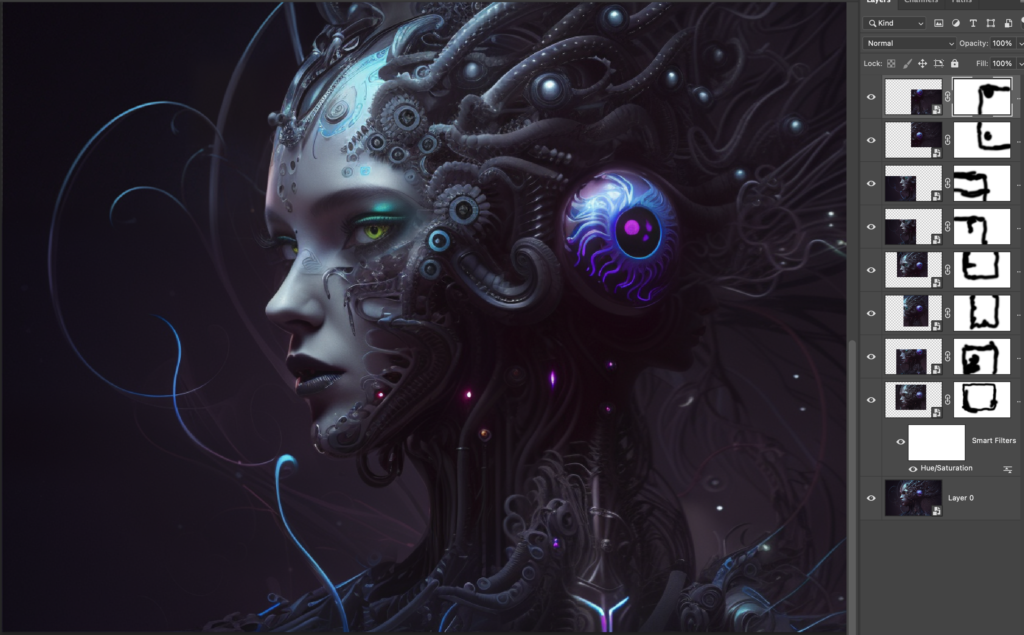
Here three layers of overlays, mainly around the face area
After that I so the same with another diffusion (robodiffusion 2.0). It gives the image a more shiny, metallic look.
Here the status after that
liiittle bit more
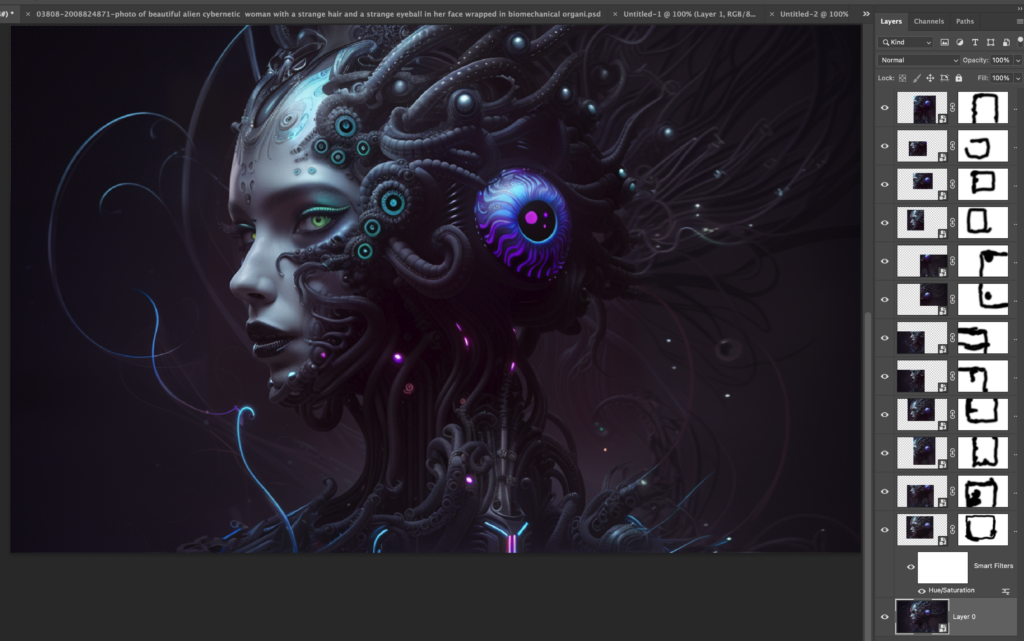
Last but not least we upscale the image. I tend to make a mix of 50/50 Esrgan_4x / R-Esgran 4x+Anime6B
There we go, hope you enjoyed the ride. All of this process is work in progress, there are also faster ways to do things depending on the performance of your computer / gpu.
